Monthly Archives: January 2013

Edge Types

A sword’s blade can be brought down to the edge in three different styles: flat, hollow, and convex. A flat edge is when the spine is angled down to the cutting edge straight and flat, the standard edge type that is for general use swords, and is right in between the other two edge types.

A hollow, or concave edge is when the spine is brought down to the edge in a concave angle, which means the sword is much sharper because of such shallow angles, though the edge is fairly delicate, so it would be best used to kill cavalrymen or other lightly armored foes by the dozens.

A convex edge is, obviously, where the spine is brought down to the edge in a convex angle. This means that the edge will be pretty dull, though because of the thickness it will not dent or break on impact, making it suitable for fighting against heavily armed and armored foes.

I had found this video off youtube that begins by describing the edge types in detail, in showing how he makes his sword:

Roman Chain Mail

Mail

Mail (Photo credit: awrose)

(photot credits: Wikipedia)

Chain Mail is a peculiar type of armor, made to allow easy movement. It was farly heavy, however, and so it was used quite a lot for cavalry, of whom the riders did not have to run and jump such as an infantryman would. However, they did do a lot of movement, as they would have to twist their bodies to hack at enemies on either side. Infantry as well, used it quite a lot, especially the Principes, who were richer and able to purchase better equipment than the Hastati. And yes, people who joined the army in those days had to supply their own equipment.

So what is this, Chain Mail? You may have seen photos of it, but up close? Do you know how it was made? If not, that’s why you are reading this article. Chain Mail is made with a whole bunch of small rings. How it is made is the smith makes one small ring, rivets it closed, and places it in the center of his workbench. He makes four more rings, and put them all on the first, riveting them closed. To each of these rings he then attaches three other rings, and rivets them closed. He keeps going, making sure that each ring has four others attatched to it, and gradually fashions into whatever piece of armor is needed. One way that this was done, is the smith would make a bunch of strips of chain mail, and so he could then attach them to eachother easily and without confusion in making the armor. Trust me, I have made a bit of chain mail myself, (I didn’t get very far as I had very little wire) and it is hopelessy confusing unless you know exactly what to do.

Once the armor was finished, say, as a tunic, it would be sent off to the legion, where the soldier who received it would wear it just as he would a regular tunic, though this is much stronger. However, some chain mail was not riveted together, and just bent so the ends of the ring touched. Though MUCH less work, this armor was ineffective against arrows, wich could just punch through and burst open the rings. Even with riveted armor, a hard spear thrust could burst open the rings as well. Also, against a mace, the mail served little protection, as the mail would just transfer the force of the blow through it into the body of the soldier. The advantages is that against a slash from a sword, it was nearly impenetrable as each ring was much thicker than plate armour, even though it weighed just as much.


Enhanced by Zemanta

The Hastati, Principes, and Triarii.

Before the Marian Reform, the republic’s army was always organized in a particular order of battle; the main units in this order were the Hastati, Principes, and Triarii. The Hastati were young, inexperienced swordsmen who formed the front battle line, and were normally the first to engage the enemy after throwing their Pila.

If they were inable to break the enemy line or do very much damage, they retreated behind the Principes, who were similarly armed though with chain mail and higher quality equipment. The Principes were older and more experienced than the Hastati, and probably served as Hastati when they were younger. If the Principes also failed to break or damage the enemy lines, then the Triarii came in.

The Triarii were armed with spears instead of gladii, and were the most experienced, hardest trained of the three, and, as they were fairly “rare”, were only deployed at crucial points in the battle line, and to reinforce the other troops as they advanced. Cavalry were used to cover the flanks and the advance of the troops.

These three unit types all had the rectangular wooden shield with a centered iron boss that did not change very much over the course of Rome’s history. The Principes and the Hastati were armed with two pila, a heavy one and a light one, so as to be able to throw the lighter one a farther range, and do more damage with the heavier one at close range. These two were also equipped with a gladius, and the Triarii had spears. It is strange that they had such weapons, and were one of the only, if not the only, infantry that used spears, and not javelins or gladii.


The Bronze Age and the Iron Age

As you know, the Roman army depended on quality metals for their armour and weapons, and so a very large number of Romans, whether slave or free, were needed to supply the sodiers with good equipment. Though it was slaves who did nearly all of Rome’s grunt work, there were quite a few poor people who needed to earn money for a living. Most did so by joining the army, but others took up work a potterers, weavers, jewelers, carpenters, smelters, or blacksmiths.

Surprisingly, metal techniques in the iron age did not change much from those in the bronze age. Casting (pouring molten metal in a mold), forging (smashing hot metal into shape with a hammer), smelting (seperating a metal from the ore), and alloying (combining two inferior metals to form a superior alloy, such as copper and tin to form bronze) were all developed in the bronze age. It was not the techniques, but more the variety of metals, notably iron.

Bronze is actually much harder than iron, and so keeps a sharper edge and holds it better than iron. However, the reason Iron pretty much replaced bronze is for several reasons. One, it is much more abundant than either of the metals (copper and tin) that are alloyed to make bronze. Two, carbon can be added or subtracted from the iron to make it harder or softer, (which the Romans actually figured out pretty early in their history) which means that they could have the edge hard so it can stay sharp, and the spine soft so it will not crack on impact, unlike bronze, which could shatter with a hard blow. And, because Iron was softer, it was easier to forge, though it was not cast.

The reason Iron was not used before bronze is the fact that Iron melts at a much higher temperature than either copper or tin, and technology was not advanced to that high temperature. It was with the use of coal and charcoal that people could get the temperatures high enough to smelt Iron, and even then, it was not enough to melt Iron, as smelting does not require actual melting of the Iron, just enough heat to get the Iron and Carbon to separate. Because of this, the Romans did not do any casting with Iron, whereas much, if not most, of bronze weaponry was cast.

So, the main reason bronze became replaced with iron is mainly because iron was cheaper and more common. Because of this, it was customary for Roman legionary Centurions and standard-bearers to wear bronze helmets, to show their rank.

Part II of my Knife Making: The Handle

Alright, I was now ready to assemble the handle upon my blade. First thing is to find a good wood for the handle, something sturdy but with a beautiful grain. I had originally planned to get some walnut wood from some friends, but I was inable to get it in time, so, what I did is grabbed a saw and headed outside down the hill to find some nice oak wood. Around here most of the trees are oak, and there are some really large trees that have fallen down long ago, and have since dried out. Oaks are known for being very gnarly, with very twisty grain, which would make a beautiful handle. I found a few good pieces, sawed them off the dead trees, and headed home to assemble the handle. Anyway, I cut two pieces into blocks and traced the outline of the handle onto the wood, making sure there would be enough room to fit all of the shank (the metal handle) on the wood. Unfortunately I used wood from two different parts of the tree, so one side of the handle will be lighter in color than the other.

Anyway, with the outlines traced out on the pieces of wood, I cut out the rough shape. Then I took one of the pieces of wood and matched it up with the shank. Very carefully I put them into the clamp, making sure the shank was still lined up with the outline I made with a pen on the wood, and drilled holes through the wood so that it lined up with the ones on the shank of the knife, and did the same with the other piece of wood.

I then grabbed some dowels, sanded them down to size by clamping them in a drill and rubbing it against some sandpaper until they fit the holes snugly. I pounded them in and begin working out the shape of the handle with a rasp. At this point I did not have to be careful about measurements; I just had to make sure they were roughly the same size on either side. Because I was using a rasp, I did not have to be very cautious, as if I used a power tool I might have ground away too much at one point, and so ruin the wood, which would mean a lot more work. As I said, because I was using a rasp, I did not have to worry about this, and so I focused on getting the little bumps and dips that would make it fit more easily into my hand. Finally, I began sanding it, though I only did so a little, as it would be interesting to have a knife with a fairly rough handle. 

Next, I got some poly-thingamajig oil, and brushed it on the wood to bring out the rich oak. I haven’t quite done this yet, but I will probably add a few more coats, as well as coating it with beeswax, which I can get plenty of, as my Mom owns this business. The beeswax would give the wood a good grip, and also help keep liquids from seeping in that might damage the wood or make it swell, such as water.

I have already begun to sharpen it, though is taking a while, as this knife is fully hardened, and I am using only a sharpening stone to sharpen it. I’ll get a photo up as soon as possible.


My Knife Making

Img_0194

I’ve been working on a knife using a process that does not require forging into shape, rather to get it into shape I used the process called profiling. This is when I cut the shape of a knife out of a flat piece of metal. I had bought an old file at a yard sale for a nickel, and so I used this for my knife. (It is fairly good quality, as it has to be hard enough to file steel)

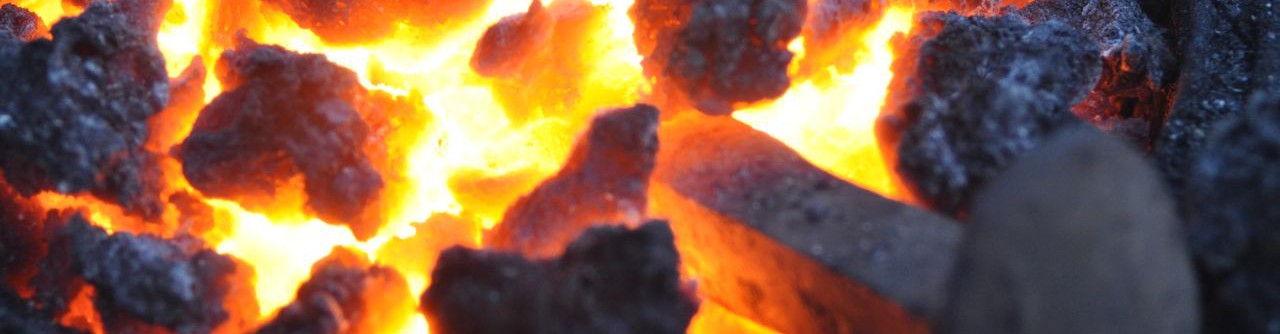
First, I annealed the file (which means softening the metal so it will be easier to work) by heating it up with a blowtorch, monitoring the metal’s heat with a magnet. Once it gets to the desired heat (an orange-red color); the point at which the atoms are able to rearrange, the magnet will no longer be attracted to the metal, and at that point I stopped the blowtorch and just put down the metal to cool slowly. This is so that at the annealing temperature (the point where the magnet stopped sticking), the atoms are able to rearrange themselves in a nice “agreeable” pattern by the time it is completely cooled down.

Once it was annealed, I went online and found a printable knife template, which I printed out and glued to one side of the file. With a combination of an angle grinder and a file, I cut out the exact profile of the knife (though later I sloped down the point a little further). Then, I clamped down the knife so the edge would be facing myself. This I slowly filed down (man, even with the metal annealed, that took a while) on both sides, ’till they sloped down and met in the middle. I did not sharpen it, however, as later on the processes would bang up the edge, and that would mean a lot more filing. Anyway, with the profile of the knife complete, and the edge ready to be sharpened, I moved onto hardening and tempering the blade.

For this part, I actually left the paper and glue on, as they were about to be incinerated anyway. I began heating up the blade, (though not the handle, as there was no need to harden it) slowly monitoring the blade with a magnet until it got to annealing temperature. At this temperature the atoms are out of place and moving around. Instead of just leaving the blade to cool, this time it is much more fun. I picked it up with tongs and plunged it into a bucket of water I had nearby. Lots of steam, awesome hissing. When I did that, all the atoms, which were out of place, became locked into those positions. This made the knife hard and brittle. To test out that the hardening worked correctly, I ran a file along the blade and along the handle. On the handle, it made a low-pitched sound, cr-ggghhhh, and a large mark. On the blade, it made a high-pitched sound, ssshhhhiiiiiinnnngg!, and a hardly visible teensy-tiny mark. The blade was hard, but very brittle. Too brittle. Which meant it had to be tempered.

Tempering a blade is softening part of an already hardened blade so it does not snap or chip. However, we do not want to temper the edge of the blade or the point, as tempering them would later on result in denting and very quick blunting. So, I only tempered the spine, or back of the blade. To begin, I sanded off all the firescale (oxidization caused by the heating from when I hardened the blade) from the blade, you’ll see why.

Anyway, I began slowly and carefully heating up the back of the blade, staying away from the edge and point. Have you ever seen metal, when it begins to heat up, and a sort of blue color spreads across? I waited until the blue has spread from the back of the blade until little more than halfway towards the edge and then I quenched it. The areas where the blue colors are are a certain temperature, and it is at that temperature that the atoms loose up from their very tight fitting just enough to effectively soften it. Then the quenching locks that in place. The edge and point however, remain untouched and unaffected. 

After I had done this I sanded off the accumulated firescale, and sanded off the blade further, making it nice and shiny. I then drilled two holes in the handle for fixture of the wood. I’m not sharpening it yet, as the handle still needs to be assembled. I’ll post about that once it’s finished.


The Gladius, The Sword of The Legions

Uncrossed gladius.jpg(photo credit: Wikipedia)

A gladius. This is the main weapon of the Roman Legionaries. Of the famous Preatorian Guard. What is this weapon, that it helped Rome to conquer the known world? Was it some leaf-shaped slashing weapon as used by the Spartans? Was it a huge, long but straight sword as used by the Gauls and other Barbarians? No. In fact, the Gladius was little more than a dagger. It would have been about a foot and a half long; not what you would call awesome, but it served the purpose of the legion.

The normal deployment of the legionaries was to have them advance towards the enemy either with their shields up, or in Testudo formation (where they lock together their shields together so they are covered with them on the front, top, and either side). When they come near enough to the enemy lines, they take out their Pila and throw them into the enemy lines, ‘softening up’ the enemy before the real fighting begins. Now the legion continues to advance, shields in front of them, no longer in testudo formation. They lead with their shields, gladius in the other hand, behind the shield and at waist level. When they come into contact with the enemy lines, they push with their shield whilst stabbing at the stomach with the gladius. Once the enemy line is disrupted, the gladius can be used for slashing as well, as there is more room in which to fight.

Cavalry, as they were not bunched up in tight formation, could make use of a longer sword, called a Spatha, and were basically the same as a gladius except way longer.

Even though they were small, the galadius had to be strong to be used to better effect. The Greek xiphos was made of bronze, which is actually very hard, harder than the iron used in the swords. Well, not harder than ALL of the iron, as you know that iron can be hardened by adding carbon, or softened as well. By the time of the empire came along, the Romans had discovered all this hard-soft stuff, and I’ll give you a quick overview on that.

In the original smelting, the furnaces were actually not hot enough to melt the iron, just get it to the point were it was a sort of sludge, and separate from the slag (the other stuff mixed in with the iron) and then fall to the bottom to be picked up (with tongs, of course) my the////// smelters. This iron is extremely high in carbon, and so is very brittle. The carbon can be “beaten” out, and so is placed on an anvil and whacked multiple times with a hammer, knocking the carbon out until the metal is a desired hardness. I’m not kidding about that, by the way.

Anyway, for the gladius, five strips of metal, in varying hardnesses, are used. The softest one is used for the center of the blade. The other strips are “pressure welded” (basically a fancy term for “whacking together”) to the center strip, then the thing is pounded into shape, sharpened on a grinding wheel, and given a handle. This a Roman sodier takes into battle, doing a surprising amount of damage for such a small thing.