Monthly Archives: March 2013

Just a Fun Design I Came Up With

A little while back, I came with the idea to design a new weapon, sort of a woman’s self-defense, though it might be a little big to be carrying around with. Anyway, behold! The Serrated Frying Pan!!

Now, look at the center diagram. At the top/front, there is a large spear point protruding from the pan. This is for quick jabs or the cases when the wielder is able to do a powerful thrust. The point widens quickly as it goes closer to the pan, and so would do quite a lot of tissue damage.

Now, look on the right side of the main pan. The right side is serrated, designed so that in a good swing, even if the pan only grazes the enemy, the serrations will grab onto the surface of the target, and so rip out the surface, causing terrible tissue damage.

On the opposite side, the edge is not serrated, rather it is a plain cutting edge, and would be sharpened razor sharp and polished smooth. This part would act like an axe blade, for cleaving through enemy lines, splitting wood, or shaving.

Now, in the center, we have the main part of the pan itself, the stun, or concussion, plate. This is a very important part. You see, electricity is supplied up to the stun plate from the handle. The little jewel you see at the center of handguard is a button, which activates or de-activates the electricity. Once activated, a single tap on an average human can cause concussion immediately. Some people prefer the concussion plate without the electricity, as they like to hear the “boioioioioinnnnnggg” of the pan hitting someone’s head. This is less effective, but more enjoyable, generally.

At the very bottom of the handle, (look at the first diagram) you see small blades that have been folded out. These are designed to stay inside the handle, in which case the bottom of the handle resembles a thin spearhead. Once it is stabbed into a surface, however, the pressure releases the spring-activated blades, and they swing out, in much the same way as a mechanical broadhead, so that they do enormous tissue damage once fully folded out. The blades themselves would also be able to detach, and be used as small throwing knives, similar to a bat-a-rang.

A Discovery!

A little while ago, I was in the garage, working on another knife, sort of in the style of a skinning knife, but designed for use as a general-duty pocket knife.  Anyway, I had finished the grind of the knife, and so I was ready to harden and temper the blade. Before I did so, I remembered the Japanese way of hardening a blade, that is, to cover the spine of the blade with a special paste so as to block much of the heat. That way, the grind and edge of the blade are left exposed to the heat, and so when quenched, lock in the hardness. The parts of the blade covered with the paste do not receive as much heat, and so does not harden. Anyway, I tried looking up on Wikipedia what exactly the paste is made of, but all they said is that the base ingredients were clay and ash, and the other ingredients are trade secrets. Darn Samurai. 

So, what I did, was I went out in the backyard, where we dumped the winter ash from the fireplace, scooped up a bit, and went into the garage. There, I grabbed a bit of Plaster of Paris. I mixed up the ash in a little container first, and put in a bit of water to make it into a paste. Then I put in a bit of plaster, about 20% plaster of paris to 80% ash, not including the water. 

I then spread a good thick layer of this paste over the spine of the blade, and those other places of the blade that were to remain soft. Then I cranked up the Acetylene torch.

I applied even heat to the blade, avoiding the pasted areas, until the blade was an even orange-red, where a magnet would no longer stick. At that point, I quenched the blade, locking the atoms in their places. The sudden cooling knocked off the dried paste, and when I drew out the blade, it the black color it usually is after hardening, though a bit of the paste remained to show the outline of where the rest of it had been. 

I then chose a hardness pick, a Mohs Hardness of five, and started drawing it in the area that was previously covered with the paste. It scratched easily. I then re-directed the pick into the area not previously covered with paste, and in that area the pick did not make a single scratch! It had worked! I then tested the hardened area, and it turned out to be a hardness of about 7-7.5!

Perhaps later, when, or if, I polish the blade, the signature wave of a katana will appear, and then, I will truly be happy!


Scalpels And Skinning Knives

File:Various scalpels.png  (Above photo credit: Wilburn Forge)

A few days ago I was at our friends house, watching them dissect a toad. Or maybe it was a frog. Whatever. Anyway, one of the main tools they used was a small scalpel. The ugly, cruel-looking little tools are quite efficient, and perfect in its use for dissecting flesh, or, in the case of a skinning knife, skinning a deer. This is partly due to the design of the the little knives, and partly due to the incredible sharpness.

The curve, especially, is vital to the efficiency of these knives. As the blade is drawn against the cutting surface, the curve goes along with the natural motion of the hand, rather if it was a straight blade, like a dagger, being drawn across the hide, it would be very awkward and hardly cut at all.

The hardness of a scalpel or skinning knife is also a vital factor in the performance. Because it is so small but thick, there is hardly any risk of the knife breaking, so it can be made very hard, and so hold and very razor sharp edge.

In this respect, a scalpel is a little different from a skinning knife, as it is much thinner and meant for cutting tiny little portions of flesh hidden, maybe, way underneath a bone or the heart. If you used a heavy-duty skinning knife for small, delicate operating, you would be able to cut out whatever part you wanted, but probably also disintegrate a few other organs as well. The same goes for using a surgical scalpel for skinning a deer. You start at your starting point, and start drawing the knife down, but you have to press hard to cut through the thick, leathery hide. Snap goes the thin little scalpel.

Knife Parts

This is partly for my own benefit, partly for yours. Here I will write down and explain the different parts of a knife’s blade and handle. File:Knife parts.jpg(Photo Credit: Wikipedia)

1: Is the blade, and

2 is the handle.

#3:The Point of the blade, normally very well sharpened, as it is one of the most functional parts of the blade, as it is first part of the blade to impact, and must be designed to slide cleanly through whatever it is stabbing.

#4: The Edge. This is the little angle that extends all along the length of the blade, and at a different angle from the Grind, it is normally created by sharpening. This part does the cutting.

#5: The Grind, the part that forms the main angle of the blade. The edge cuts into a surface, the grind separates them apart. The grind can be hollow, straight, or convex.

#6:The Spine, on the back of the blade. This is the thickest, softest part of the blade; thick and soft as it is not being used to hold an edge, but needs to be thick so as not to snap under pressure.

#7:The Fuller. This part is normally used in larger knives and swords, to reduce weight. With a fuller, a sword can be 20% to 35% lighter. Often, though in Civil war swords, the fuller is used (look away, this may get a little… graphic) so reduce suction when stabbed into the enemy. Without a fuller, the blade could get stuck between the enemy’s ribs, and that’s not good.

#8: The Ricasso, the section between the grind and the guard that is unangled, often just for looks and stabilization.

#9:The Guard, often made of brass for decoration, to help the hand fit better and more stable on the handle, as well as to protect the hand from debris or other objects.

#10: The Pin, keeps the handle stabilized and still, and along with epoxy holds the handle material to the tang.                                                                                                                       #11: The Lanyard, a thick string to hold onto the wrist and help keep the knife from slipping from the hand.

Okay, these are not in the photo, I just added them as things one must know.

#12: The Tang. This is the part of the blade that extends into the handle, to which the handle is fastened. It can be either a stick tang, which is just a thin stick that protrudes into the wooden handle from the blade, or a full tang, where the tang follows the full shape of the handle, to which a piece of wood is attached on either side. In the Full Tang, the tang is visible from both the top and bottom of the handle, and in the Stick Tang, the tang is not visible at all.

#13: The Handle Material. This is the thick part of the handle that attaches to the tang, normally using a Pin. Common handle material is made of wood, horn, antler, synthetic woods, plastic, or patterned metal.

Spark Testing

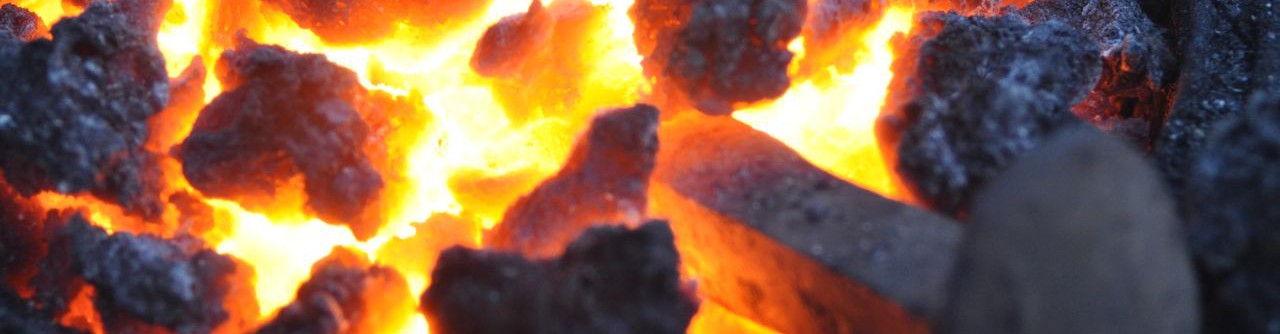
Many a time, a metalworker will receive a piece of steel that he does not know the carbon content of. To make a good knife out of it, he needs to know if it will be hard enough, or maybe soft enough. Also, the ability to anneal, harden, and temper it is reduced if he does not know the percentage of the carbon content. He could send the piece to some university with equipment fro scanning the atomic content, but that would be VERY expensive, and if he’s anything like me, there is no way he would want to wait long enough for the steel to arrive at the university, scanned, and sent back. So, what does he do? He grinds it.

When a piece of steel is put against a grinding wheel, the wheel grinds away little bits of the metal at high speed. As they leave the main piece of the metal, the friction created by the high speed grinding wheel heats up those little bits, and, as there is no other steel to help disperse the heat, they burn as they are flung away, releasing energy in the form of light.

Different steels will burn in different ways; higher carbon normally means shorter but thicker sparks, going out a little then seemingly exploding, or many sparks separating from the main one. Lower carbon would typically mean really long sparks, fairly bright, but not “exploding” very much. Aluminum can be detected easily as it does not burn, and held against a grinder no sparks come. Titanium burns much hotter than steel, and when it is held against a grinder, the sparks are super long and blindingly white.

Here’s a little vid I found that demonstrates the spark test:

http://link.brightcove.com/services/player/bcpid1274171289?bctid=1350221826

Diamonds In Industrial Use

A diamond scalpel consisting of a yellow diamond blade attached to a pen-shaped holderA polished metal blade embedded with small diamondsDiamond is one of Earth’s great rarities, and great steps are taken to mine it. Approximately 130 million carats of diamond are mined each year, and about 80% of these are not suitable for being cut and set into jewelry, either because they are too small, or discolored, or otherwise of non-gem quality. So, what do the miners do with these diamonds they labored so hard to gain? Remember, diamond is the hardest natural substance known to man. What better way to use these diamonds than for drill bits and grinding wheels?

The diamonds, embedded in the steel, will not wear down for years even if used in regular use, and are the best abrasives on the market. I myself have quite a lot of bits that I use very regularly for grinding stones, and let me tell you, they are awesome! Unfortunately, if being used to grind steel, the steel tends to retain the heat created by the friction, and so causes the diamonds to come loose from their imbedment in the bit’s surface. I’ve lost a few good bits that way.

Because of diamond’s cubic crystal growth, there are always sharp points and edges, which catch onto the surface of the stone being ground, resulting in a very fast grind. Often, extremely fine grains would be used in polishing wheels, which result in the surface being polished to a mirror finish. The larger the grains, the faster, but rougher, the grind.

Tempering

English: Tempering colors produced on the surf...

English: Tempering colors produced on the surface of steel indicate the temperature to which the steel was heated. (Photo credit: Wikipedia)

Now we have a very hard blade, a blade as hard as a quartz crystal. But that is too hard, and though there is no danger of the edge being dented, there is very great danger of it being snapped on impact. In fact, once, I had accidentally snapped a steel blade, fully hardened, with my hands!

So, it is obvious that the blade needs to be a little softer to bring out it’s full potential. If we anneal it, it is brought down way too soft and the edge will easily dent on impact, and would have to be sharpened over and over. So, the hardness would have to be brought down just a little bit, to get halfway between easily-denting-edge-but-non-brittle steel, and very-brittle-but-will-not-deform-or-dent-on-the-edge steel.

This process is called Tempering.

To temper the steel, first the blade is brought to a near polish, and then the torch is turned on a very low flame. Often a furnace is used, but I use an acetylene torch. The torch is then applied to the blade, making sure to apply more heat to the spine and back of the blade rather than to the edge. Now, the color of the steel must be VERY carefully watched. With even a little bit of heat, the steel begins to change color. Once the back and spine of the blade is a dark blue color, and the edge is a light straw brown, the torch is taken off, and, depending on the steel, is either quenched or left to cool.

As you probably guessed, the colors were caused by, and indicate, the levels of heat. In the photo above, you can see the colors from left to right, right being highest in heat and left being fairly cool. It starts out as silver color steel is normally (not visible in the photo), and then begins as a very light brown, then gets a dull straw color, and gets an intense straw yellow, an almost clear yellow, then goes brown, then a dull purple, then intense purple, then a really dark blue, and progressively gets lighter and lighter blue, then begins to turn back to the regular steel color, and then begins to turn red and glowing.

But what causes the initial coloring, from straw yellow to light blue? As I have probably said before in some long-lost post that I am too lazy to find, when heat is applied to steel, the heat attracts oxygen to the surface, and there they bind together. Heat promotes bonding. When the heat is applied to the blade, very small levels of oxygen are bonded to the surface, and create a thin layer of iron oxide on the surface. Light goes through this semi-transparent layer, (practically microscopic) and bounces off the shiny steel underneath. On it’s way out, the light is bounced around a little extra by the layer of iron oxide, and only certain wavelengths get through, and our eyes interpret them as a certain color. As the layer thickens, more or less wavelengths get through, and so the amount of heat can be interpreted through the colors shown on the surface of the steel. 

Even after cooling, these colors remain, and some bladesmiths will leave the color on, for decorative purposes. Usually, though, the oxide layer will eventually be worn off, so smiths usually sand the surface and polish it, and then the blade is ready to be given a handle and sharpened. 

Because of the softness in the back of the blade and the hardness of the edge, the blade will give superior performance, and can be sharpened razor sharp with risk of the edge denting, or the blade snapping.

Enhanced by Zemanta

Hardening

The annealing has been done on our piece of steel, and the smith has done all the work on the blade. Now the blade needs to be hardened so it does not dent on impact with something.

A torch is applied to the metal, and is brought up once more to the temperature it was brought to when it was annealed. I.E, the point at which a magnet will no longer stick to the metal. Quickly, the metal is plunged into a bucket of water.

At the temperature at which the magnet does not stick (let’s call that the “annealing temperature”) the atoms have shrunk together a bit, and when the metal is cooled in the water, the atoms suddenly shrink together and stay there. 

As you see, different metals would react differently to the same processes, such as copper and steel. Indeed, some steels react differently themselves! Stainless steel is hardened the same way regular steel is annealed! To be successfull, the smith just needs to know his metals and their atomic content!

I have tested the metal hardness before and after hardening: Before hardening it is about a hardness of 5 on the mohs scale.

In case you don’t remember the mohs scale, it is a hardness scale designed for minerals, on a scale of 1-10, 10 being diamond and 3 being about the hardness of a fingernail. Remember, hardness refers to the difficulty of being scratched; a diamond can only be scratched by another diamond, or some substance (not discovered yet) harder than diamond.

After hardening, the steel was about 7.5! That is even harder than a quartz crystal! Now, the blade is extremely hard, but if it goes under much pressure, it will snap easily. In fact, not long ago, I was making a dagger blade, and just after the hardening, accidentaly snapped it in half with my hands!

Quartz :: Locality: Goboboseb Mountains, Brand...

Quartz :: Locality: Goboboseb Mountains, Brandberg area, Brandberg District, Erongo Region, Namibia (Locality at mindat.org) :: Size: small cabinet, 8.7 x 2.8 x 2.2 cm ::;Smoky Quartz sceptre on Quartz :: Very unusual quartz crystal! This is a floater, terminated ALL around and on all points doubly-terminated. It has what looks like a smoky herkimer-diamond-styled quartz crystal perched smartly on one end . Truly unique amongst this crowd! (Photo credit: Wikipedia)

Enhanced by Zemanta

Annealing

From reading some of my other posts, you probably now know that to get the right combination in hardness-softness in the blade, it must be first annealed (Softened) for working, then once the blade is nearly done, hardened so the edge will not dent, and then tempered (softened) slightly to get certain areas of the blade, such as the spine, soft enough so they will not crack.


Today we will start with annealing. The process differs in different metals and in different types of steel. For an example, let’s start out with, say, copper wire. The wire had been twisted and bent, wrapped around an object then unwrapped. All this movement pushes the individual molecules closer together, jam-packing them and fitting them into tight little places between the other atoms. This makes the wire very hard and brittle, and is extremely hard to bend. This is when annealing is desired.

The metal is heated up evenly, usually with a torch of some kind. For proffesionnals, the room is normally darkened so as to see the color of the metal better. As soon as the wire reaches a dull cherry red color, it is quenched, which is a fancy word for saying “dunked in a bucket of water”. What happens in this process is, as the temperature increases, the heat weakens the bonds between the atoms, and causes them to slightly move away from eachother. Once the copper reaches a dull cherry red color, this is when the atoms are as far away as possible without the bonds breaking and the atoms fully coming apart. Then the metal is quenched, which locks the atoms in those places, and so the metal is much more malleable and the smith can get back to work.

For certain types of steel, however, the process is slightly different. The steel is heated up to much more than a dull cherry red, instead it is brought up to an orangeish-red color. At that temperature, the heat is too difficult to judge by color, so a magnet is touched to the surface of the steel. At a certain temperature, the steel loses its magnetism, and the magnet will no longer stick to the surface. Once the metal has reached this temperature, the atoms have nearly been freed from their bonds, and are pretty far removed from each other. The smith would then cover the steel with a sort of sand that retains the heat instead of dispersing it. I’ve heard that many people use (clean) cat litter.

Being brought up to this temperature, the atoms sort of shrink in close together, and when the metal is cooled slowly, the atoms are allowed time to expand out from eachother and form a loose formation, which, once the metal is cool, is soft and malleable.

Enhanced by Zemanta